As part of our experiments with reinforcement learning and autonomous navigation, we need to generate a realistic simulated environment for testing such models. However, current technology unfortunately just doesn’t have that level of fidelity! For instance, a building in a map generated by satellite images will be mainly displayed as a rectangular mesh, omitting various details such as whether windows are open or closed or fences surrounding the building. In addition, not all places are marked, with mainly populated areas being displayed. As such, some areas like SUTD Parcel D (where our office is based!) have limited detailing available. While this can be regarded as a small issue, accuracy should always be at its higher so that RL training can be conducted in an environment that mirrors reality, as minor shifts in details can potentially affect results of a mission.
In this article, we demonstrate our experiments with photogrammetry, a technique to extract higher-fidelity 3D meshes of objects via simple pictures from a mobile phone camera.
What is Photogrammetry?
Photogrammetry is the extraction of 3D information from 2D images, using overlapping photographs to create digital models, maps, and other representations of real-world objects or scenes with reliable measurements. Photogrammetry is a process that involves capturing numerous photographs of an object or area from various angles. By ensuring that the images considerably overlap, the technique gathers perspectives that are later stitched together. This information leads to the creation of a detailed 3D mesh, where a greater number of frames results in higher quality and more accurate reconstructions.
In practice, photogrammetry can be done via two methods based on the scale of the subject being imaged. One prominent type is close-range photogrammetry. This method is commonly used when the focus is on small objects, such as artifacts or mechanical components. In these cases, a handheld camera or one mounted on a tripod is used to capture every minute detail, ensuring that the final 3D model is as precise as possible. On the other hand, aerial photogrammetry is used when the objective is to model larger areas, such as landscapes or urban environments. In this setting, the images are taken from the air - typically using drones or aircraft. This approach not only allows for the creation of expansive maps but also helps in generating detailed models that can be used for urban planning or environmental analysis.
To add on, photogrammetry input can be given in two distinct ways: a video or a number of images. Typically, the quickest way to generate this 3D model is to input a video shot in an area and allow the software to automatically split the frames. Alternatively, hundreds of images can be placed into the software to reconstruct detailed 3D meshes.
Both methods rely on the fundamental concept of overlapping photographs to generate a reliable 3D mesh. Whether working up close or from high above, the goal is to put together multiple angles in order to capture the complete essence of the subject in a way that is both accurate and visually coherent.
Our Experiments
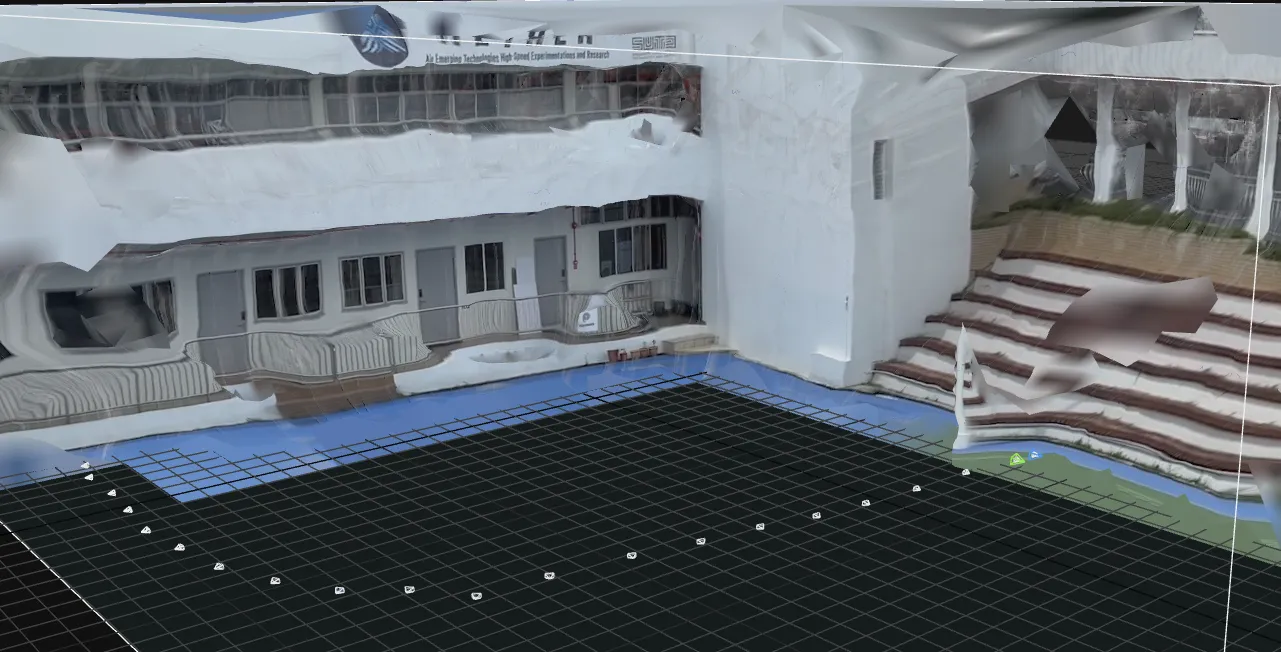
Photogrammetry is ubiquitously available via Unreal Engine’s Reality Capture Mode. Based on a quick simple video taken just around SUTD Parcel D, we managed to display a relatively clear mesh of the surrounding. However, the generated mesh was not of standard quality. To gain better quality, the desired procedure to generate an area is to:
- Use a better camera (better resolution shots) )along with a stable platform to minimize blur (can use gimbal, tripod etc).
- Ensure there is no zoom. Meaning to focus on the shots from the same distance or not zooming into the shot when using the camera.
- Ensure consistent lighting. Make sure there’s not too many shadows and enough light for object visualisation. (preferably done during the day)
- Ensure image overlapping of about minimally 50% for ideal construction of mesh.
The number of frames/shots is very important. More frames would result in a more clear and realistic mesh generation.
 Note: This can be done either by phone or computer using the reality capture application.
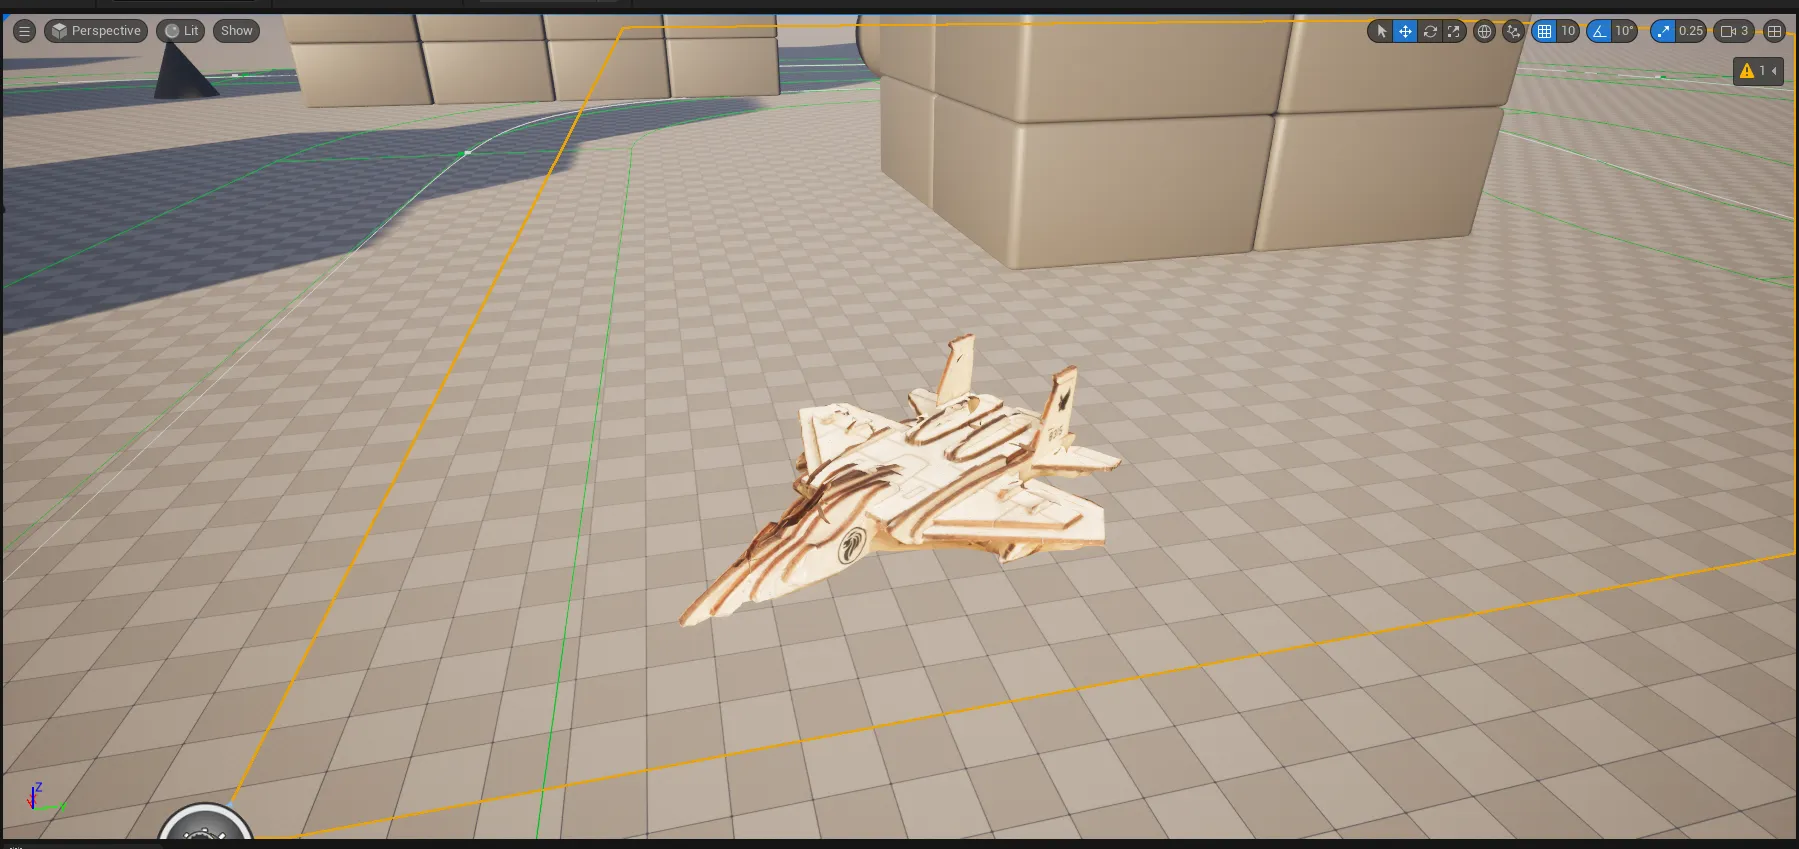
Another example here, this was taken from a small toy model which is easier to conduct photogrammetry due to the variety of angles along with the favourable conditions which can be taken which resulted in a detailed mesh. (This mesh was exported to Blender and then inserted into UE5).
 Note: This can be done either by phone or computer using the reality capture application.
Enhancements
However, if there is a need for minute details, using LiDAR data alongside the images taken would be the best solution for extremely detailed models. Lidar dense point cloud data can be used alongside photogrammetry which excels at capturing textures and details. Leading to more realistic and accurate 3D models. In conclusion, LiDAR can capture details that photogrammetry may miss, such as areas obscured by shadows or vegetation, while photogrammetry can provide the visual context missing in LiDAR point clouds.